Building Your Own
⌨ Keyboard
Indonesia Mechanical Keyboard Meetup
8 April 2017 - Dattabot Dojo, Senopati, Jakarta
by Priyadi Iman Nurcahyo - priyadi@keyboard.id - keyboard.id
Don't Be Intimidated!
It is not a 🚀 Rocket Science
- Automatically generated design using tools provided by mechanical keyboard community.
- Sandwich case. Simple, easy to understand 2D design.
- Laser cut components. No expensive and complicated molding or machining.
- No designing by hand required.
- No programming required.
Required Tools
- Soldering Iron
- (optional) Multimeter
- (optional) Solder sucker
- Screwdriver
- Cable cutting & stripping tool
Components: Plate and Case Materials
-
Material for switch plate
metal plate, 1.5mm thickness, common materials are stainless steel or aluminum alloy -
Material for case
most common material is acrylic
Tips: Ask your laser-cutting workshop first, they might be able to provide the material for you.
Components: Controller Board
An Atmel AVR controller board with hardware USB is a safe choice, it is:
- common
- well-supported
- powerful enough for a keyboard
- practically unbrickable
The most popular controller chip is the ATMega32u4.
Components: Controller Board, cont.
- Teensy 2.0. Very popular but not that common in Indonesia. Recommended for beginners.
- Teensy++. Similar to Teensy 2.0 but with more pins for larger keyboards.
- Pro Micro. Cheap and plentiful in Indonesia.
- Adafruit Feather Bluefruit LE 32u4. Supports battery and Bluetooth.
Other Components
- Switches and keycaps *
- 1N4148 diodes
- Cables
- Soldering tin
- Screws
* Our procedure supports both Cherry MX and ALPS compatible switches.
Step 1: Design Your Own Layout
Head over to 'KLE' (keyboard-layout-editor.com), and start designing!
The "KLE Raw Data"
KLE can output "KLE Raw Data", a partial JSON metadata which is the community standard to describe any keyboard layout.
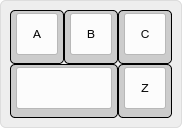
→
                                        [{a:7},"A","B","C"],
                                        [{w:2},"","Z"]
Step 2: Get Your CAD Files
- Copy 'Raw data' of your layout from KLE
- Paste into Swill's Plate & Case Builder (builder.swillkb.com)
- You will get SVG, DXF or EPS files.
- Send the files to your favorite laser-cutting workshop (i.e. LaserIndonesia.com) to get your switch plate and case.
Tips On Laser Cutting
- Get materials from the laser cutting shop if possible.
- Pay attention to kerf compensation value. Ask your laser cutting shop the correct value, or use 0.15mm.
- You can use your favorite vector graphics editor (i.e. Inkscape or Adobe Illustrator) to fine tune your results.
Step 3: Assemble the Hardware
- Install and solder your switches in matrix arrangement
- Connect each rows and columns to a pin on the controller
- In most cases, any pins other than Vcc, GND, and RST are OK
- Don't forget to take note which row/column connected to which pin
Matrix Arrangement
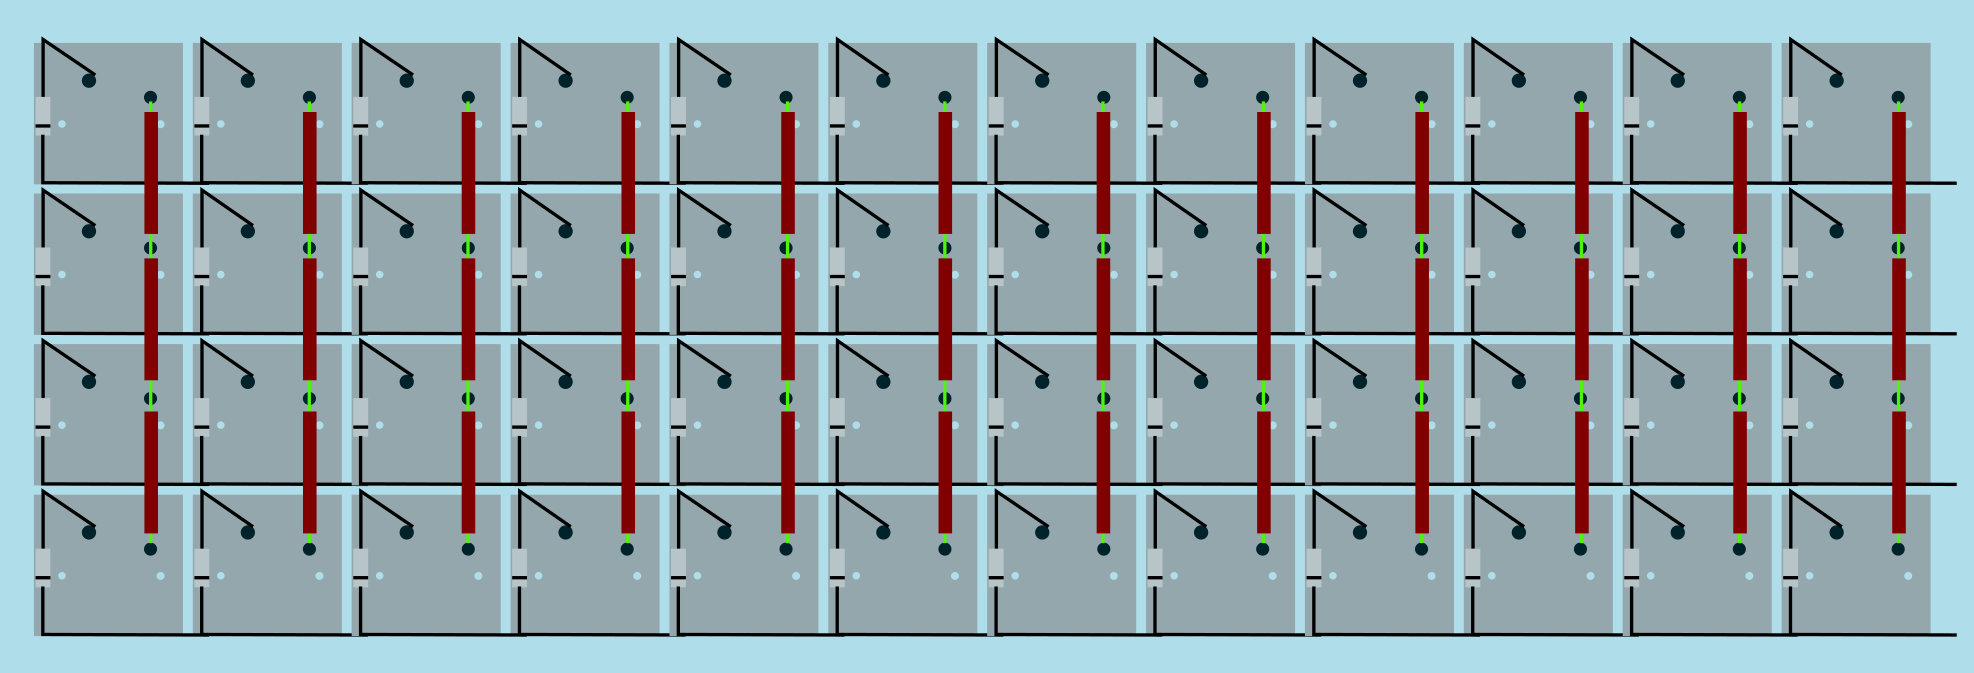
Example of standard matrix arrangement for the QMK firmware (COL2ROW setting)
Image courtesy of RoastPotatoes.co
Step 4: Generate Your Firmware
- Copy 'Raw data' of your layout from KLE
- Go to QMK Firmware Builder (qmk.sized.io) and paste your layout raw data.
- Define your wiring, pin assignment and your desired keymap
- Get your .hex file
- Flash your controller using the resulting .hex file
 QMK Firmware
Advanced users can download the source files and make further customizations using the QMK Firmware.
Some features not available from the generator: leader key, mousekeys, Unicode output, audio output, Bluetooth, Trackpoint, and more!
Step 5: There's no Step 5
That wasn't too hard, right? 😅
Showcase: Let's Split
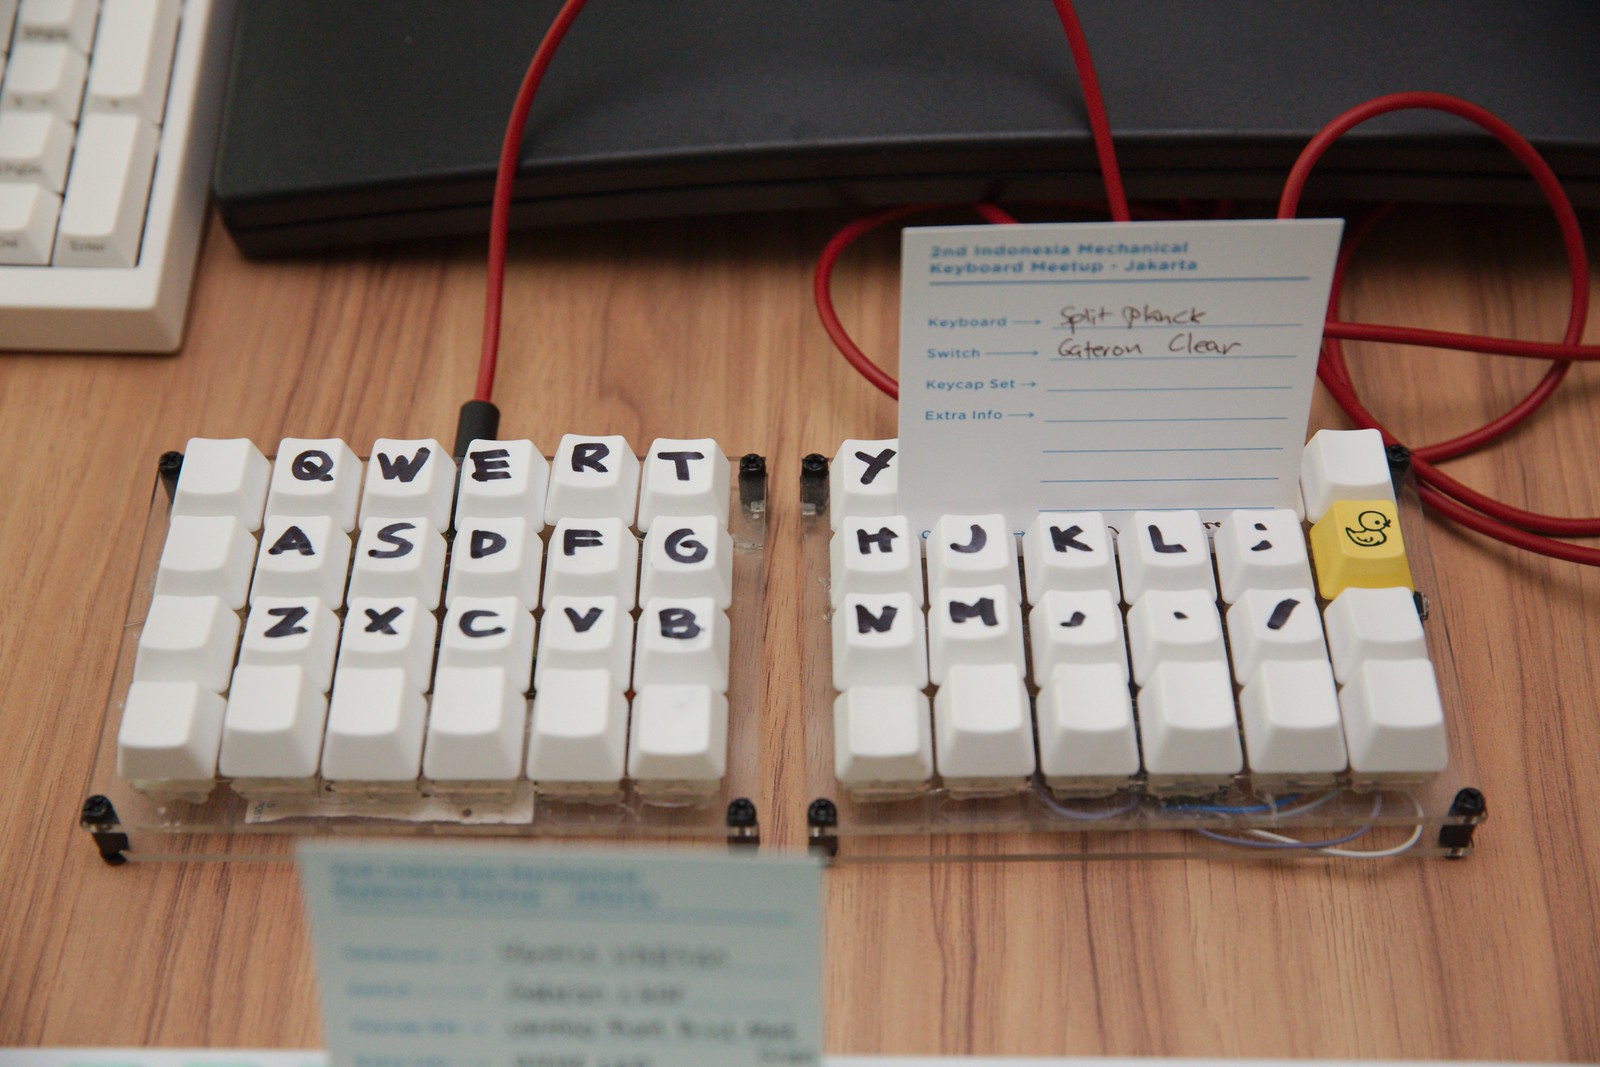
By Raihan Saputra. Dual piece split Planck based keyboard. Uses two Pro Micros, one on each piece, connected to each other by a two wire cable.
Showcase: Promethium
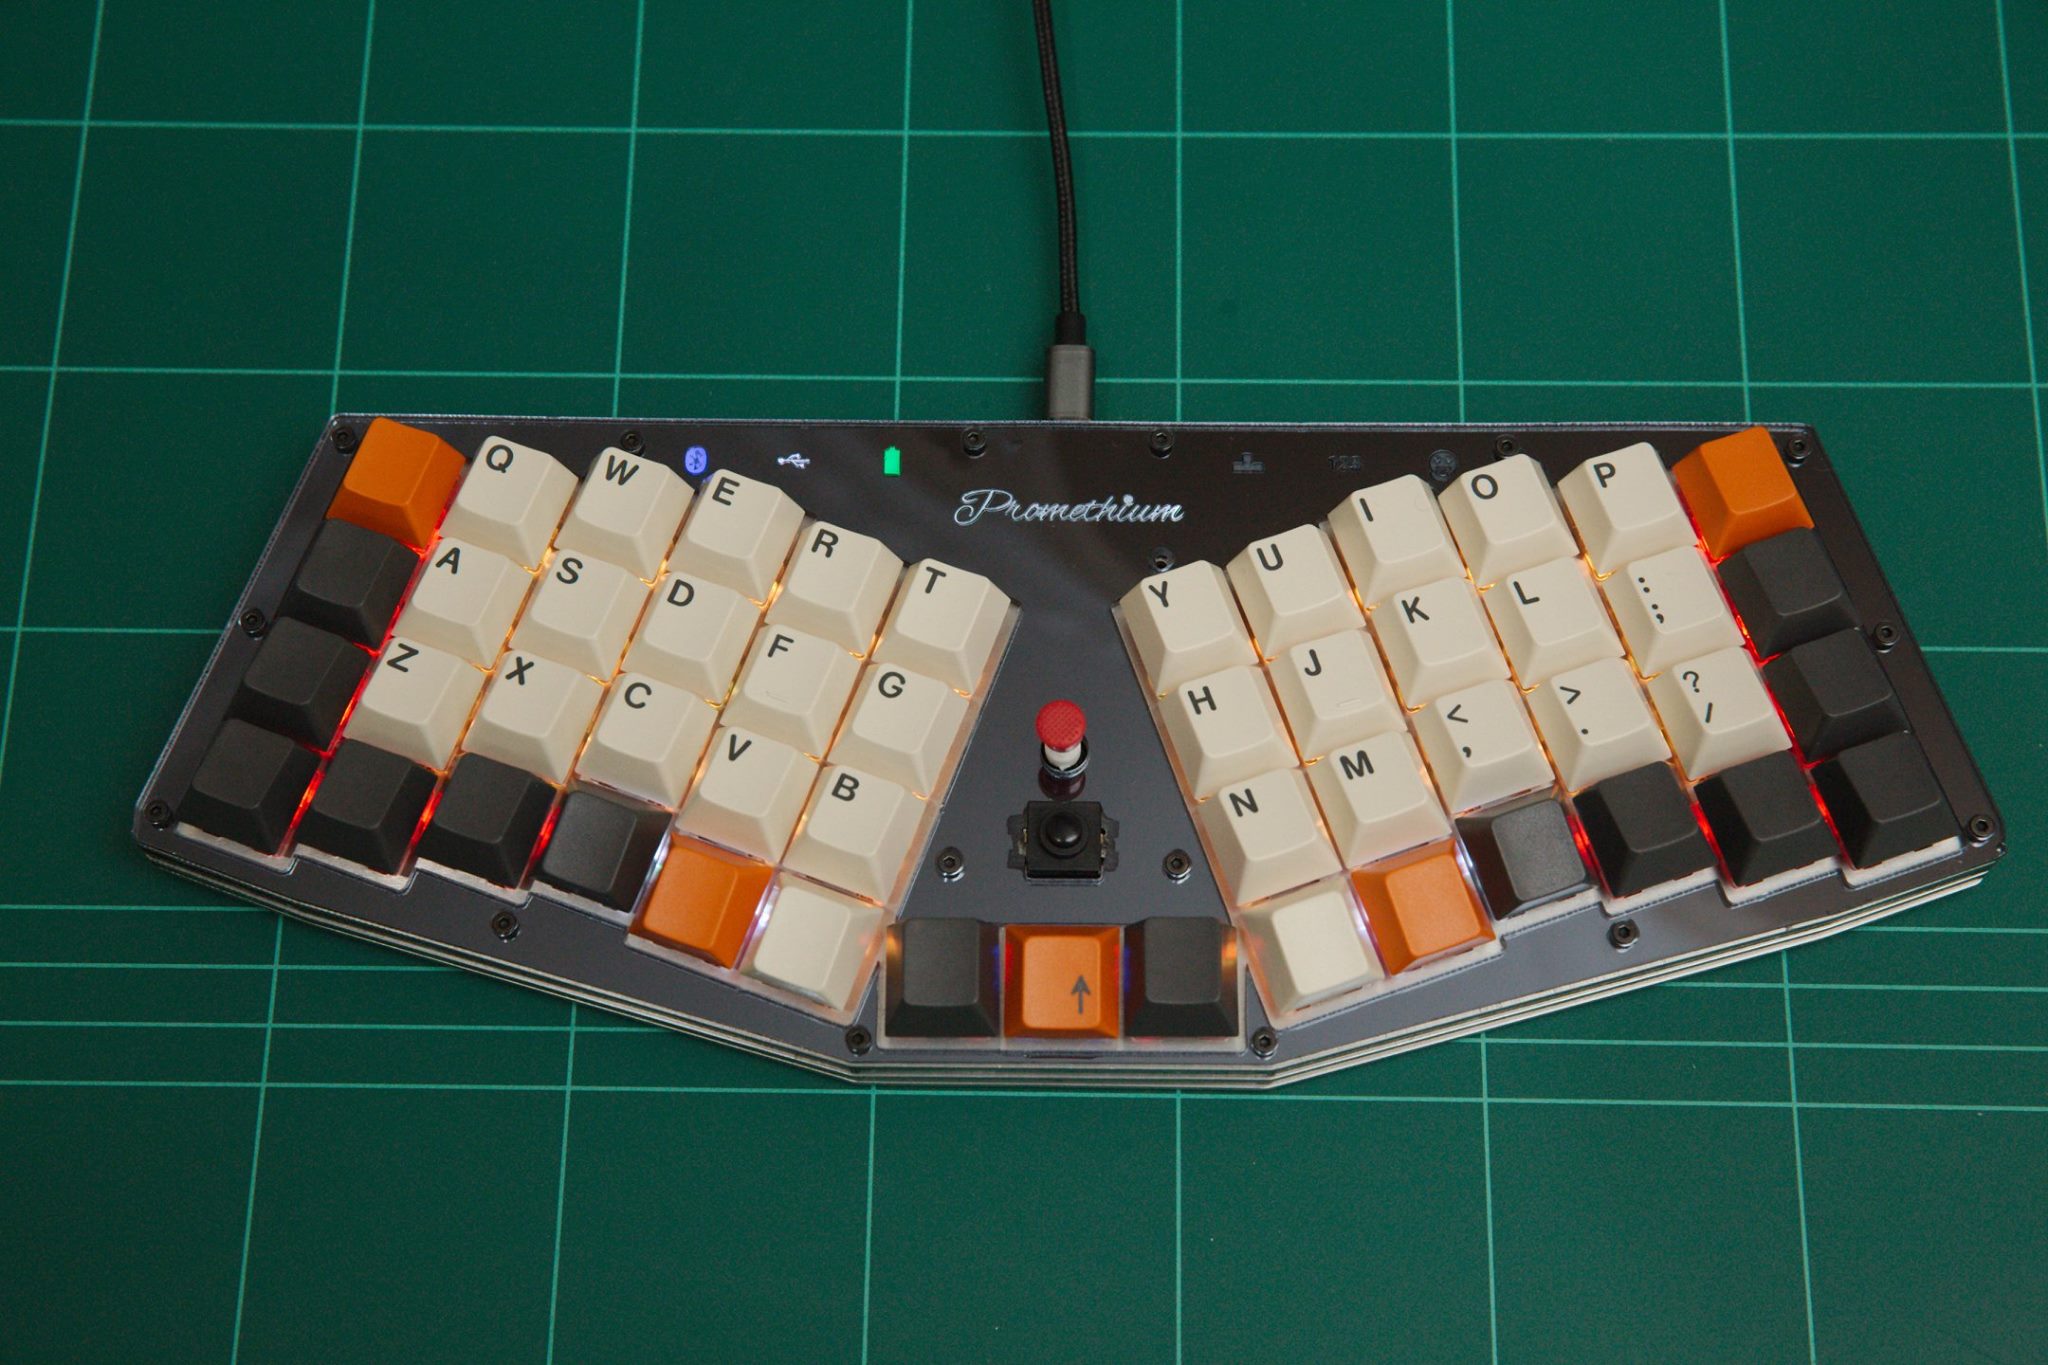
By Priyadi. Single piece split Planck based keyboard. Adafruit Feather 32u4 controller. USB & Bluetooth. Trackpoint for mouse control. Per switch RGB LED.
Showcase: Atreus 64
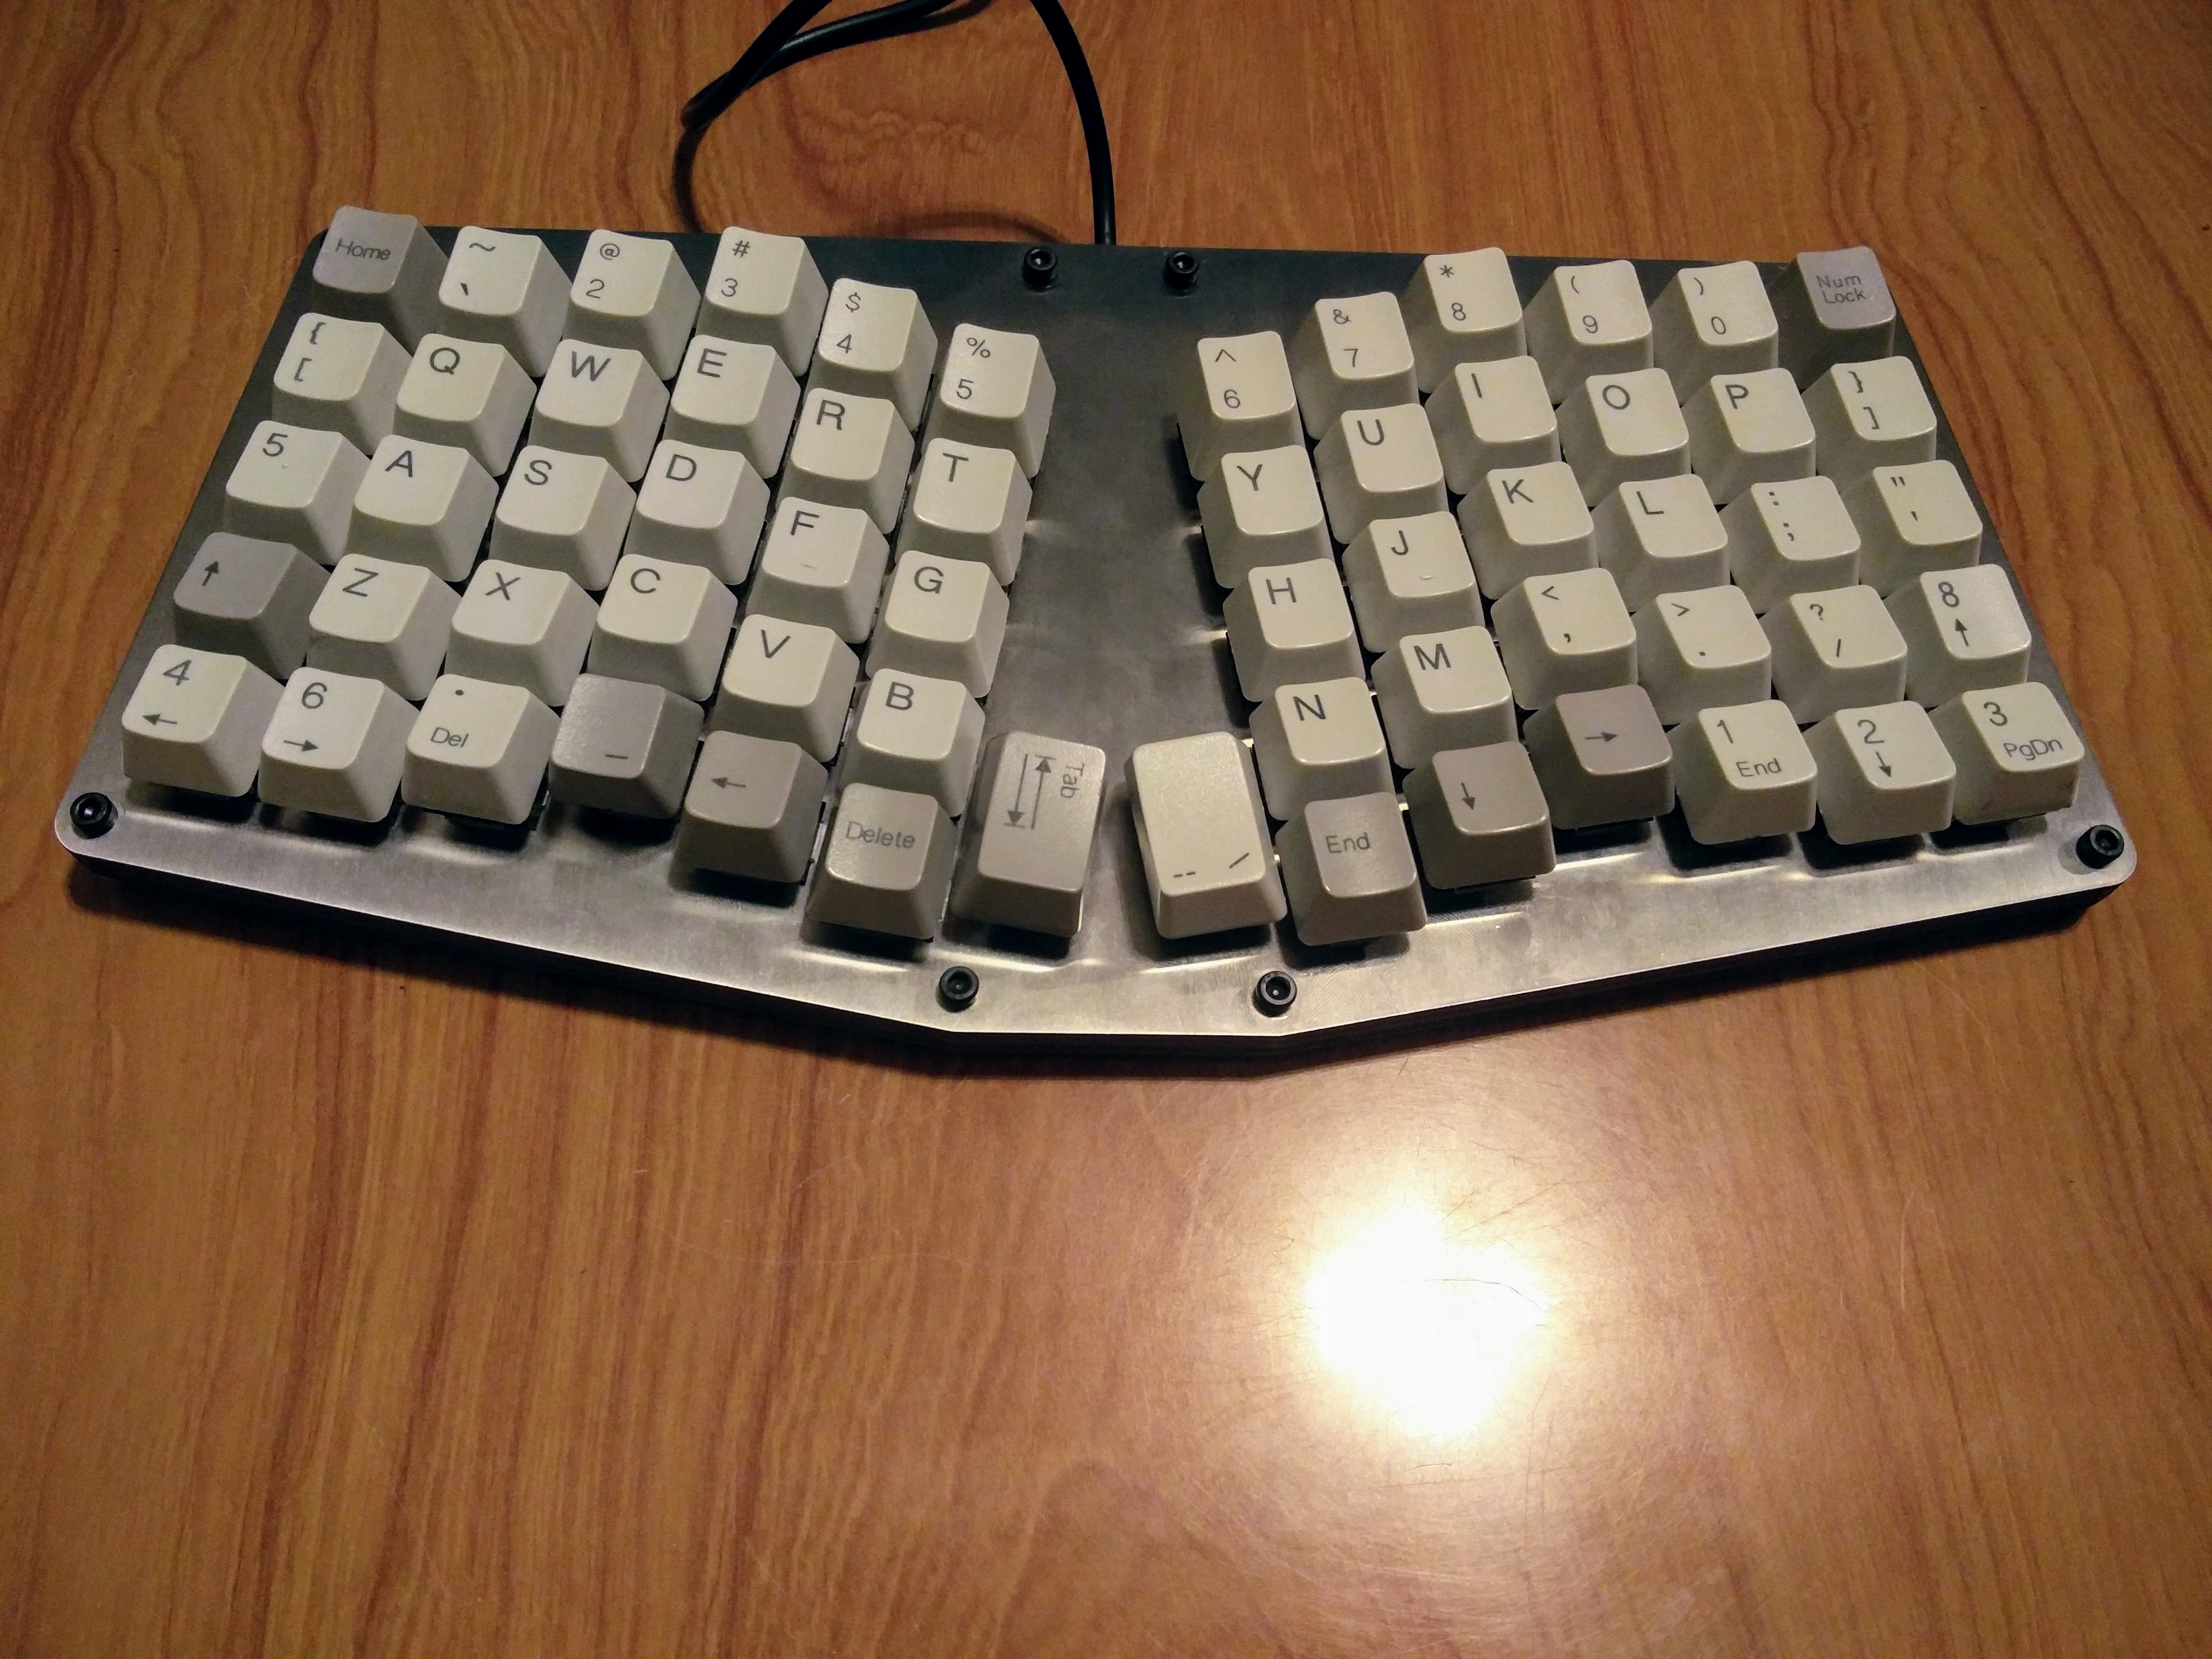
By Derek Schmell. An Atreus with extra rows and columns. Pro Micro controller. Matias quiet switches. All stainless steel plate and housing.
Showcase: [your keyboard here]
You know what? We could use more keyboards to showcase here 😅
More Keyboard Building Stuff...
The End
PS. Don't forget to document your build process and publish it.